- Contact Us Today
- Sacramento (916) 476-8396
- Carmichael (916) 978-1041

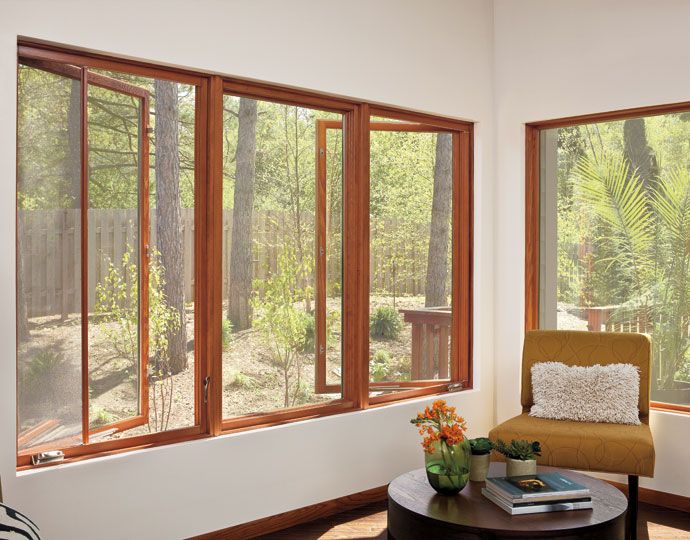
How to Replace Window Screens
At some point, every homeowner will need to replace a window screen. Whether it’s due to damage from a storm or simply wear and tear from everyday use, replacing a screen is a fairly easy do-it-yourself project. In most cases, you’ll just need a few simple tools and materials, which can be found at any hardware store.
Luckily, replacing a window screen is a relatively easy and inexpensive task. Here’s how to do it:
1. Gather the Necessary Supplies and Tools for Replacing Window Screens
In order to replace a window screen, you will need a few tools. First, you will need a screwdriver to remove the screws that hold the screen in place. Next, you will need a measuring tape to make sure that the new screen is the same size as the old one. You will also need some tacks or staples to secure the window screens. Finally, you will need a utility knife or a razor blade to cut the new screen to fit. You should also wear safety gloves to prevent getting cuts during the whole process. With these tools, you should be able to easily replace your window screens.

Note: The items you will need to replace your window screens depend on the type of screen and frame you have. If you have a wood frame, you will need a screwdriver, pliers, and a utility knife. For an aluminum frame, you will also need a screwdriver and pliers, but you will use a hacksaw instead of a utility knife. If your screens are held in with plastic or metal tabs, you will just need to remove the old screens and install the new ones. If your screens are stapled in place, you will need to remove the staples with pliers before installing the new screens. In all cases, it is helpful to have a friend or family member assist you in holding the frame steady while you work. With the right tools and some patience, replacing your window screens is a relatively easy task.
2. Remove the screen from the window by tapping on the top corner of the screen until it pops out. If it doesn’t pop out, you may need to use a screwdriver or other sharp object to pry it open.
 The next step is to remove the old screen. In most cases, this can be done by tapping on the top corner of the screen until it pops out. If the screen is particularly difficult to remove, you may need to use a screwdriver or other sharp object to pry it open.
3. Lay the old screen on a flat surface and measure its dimensions.
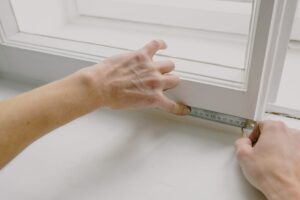 Before you start measuring, take a look at your window and decide whether you want to replace the entire screen or just a section. If you’re only replacing a section, you’ll need to measure the dimensions of the damaged area. Once you have your measurements, lay the old screen on a flat surface and use a ruler or tape measure to get the exact dimensions. If you’re replacing the entire screen, you’ll need to measure the width and height of the frame. Keep in mind that you’ll also need to leave space for the new spline, which is the thin strip of rubber or vinyl that holds the screen in place.
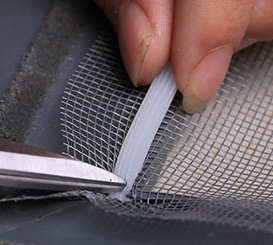
4. Cut a piece of new screen material that is slightly larger than the old one using a utility knife or a razor blade.
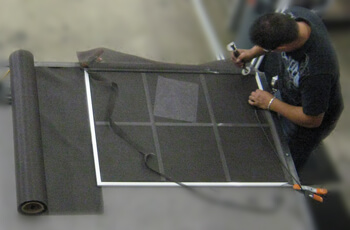 Now that the measurements have been taken, cut a piece of new screening that is slightly larger than the old screen. Cut the new piece of screening using a utility knife or a razor blade. Make sure to add an extra half inch to each side to allow for the frame.
5. Attach screening material to the top corner of the window frame using small tacks or staples.

After you’ve finished cutting out a new screen for replacement, attach the screening material to the top corner of the frame using small tacks or staples. Make sure to stretch the window screen and attach the top part securely and nicely.
6. Pull the screening material tight and staple or tack it to the bottom corner of the frame.
 Now that the top part of the window screen is secure, pull the screen tight and continue to attach it to the frame using the tacks or staples. Make sure all four sides of the window screens are secure. To secure the new screen, start at one corner and work your way around, attaching it with small tacks or staples.
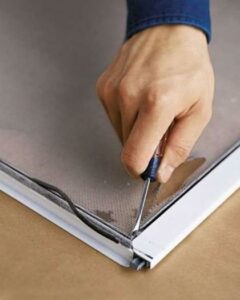
7. Trim off any excess material with a utility knife or a razor blade.
 Once the new window screen is securely in place, you can now trim off any excess screening material or spline. To do this, simply use a utility knife or a razor blade to trim off any excess material around the window frames.
8. Replace the screen in the window by pressing on the top corner until it pops back into place.
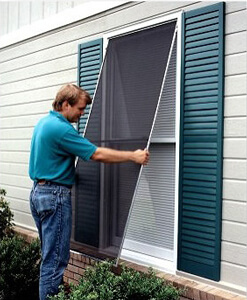
Once the new screen is in place, press on the top corner until it pops back into place. Screw them back on if necessary or if applicable. With the new screen in place, your window will be as good as new.
9. Repeat the process for any other windows that need to be rescreened.

Repeat the whole process depending on how many windows you have that need to be rescreened. Replacing window screens may be a daunting task, but with some effort, you’ll have a better home free of outside pests and bugs.
A Guide to Window Screen Replacement
Whether it’s a simple tear or an old, worn-down frame, it’s important to know when it’s time for your window screen replacement. Read on to help learn the signs a window screen replacement is needed.
Signs That It’s Time for a Window Screens Replacement
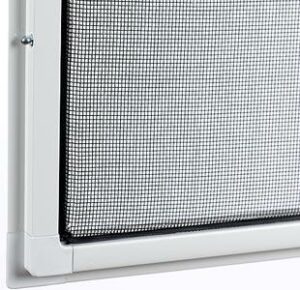
The type of frame, mesh, and environment you live in will all play a part in determining the lifespan of your window screen. It’s important to know the specific material of your screens’ mesh (vinyl coated – also called pet mesh, aluminum, and fiberglass) as the material’s durability will play a part in how long your screens last.
A standard screen that is primarily in the shade, remains dry, and is occasionally cleaned, should last around 10 to 15 years before it begins to break down and you need a window screen replacement. With more regular cleaning, you can add 5 to 10 years to your window screen’s lifespan.
Inspect the screen for any holes and tears. If the screen’s mesh is starting to look especially shiny, this may mean that the screen is old and that you need a window screen replacement. If there’s a significant tear in the mesh that cannot be repaired quickly, you may want to consider replacing the entire screen.
Window Screens Replacement Costs
A window screen replacement is a fairly low–budget project. Depending on the size and type of window, homeowners usually spend between $30 to $100 on a window screen replacement, not including installation. For custom windows with unique shapes and sizes, a window screen replacement may cost more.
Energy-Efficient Window Screens Replacement
Overall, window screens increase your home’s energy efficiency, especially in summer, when they act as a natural source of ventilation to keep your home cool.
Especially if you live in a sunny, hot climate, you may also want to consider solar/sunscreens for their window screen replacement. Solar screens can block 80 – 90% of the unwanted glare and heat from the sun, keeping your home shadier and cooler. They can also provide more privacy during the day; while homeowners will still be able to look outside with an unhindered view, solar screens will block outsiders from looking inside. Solar/sunscreens provide especially effective privacy at night, preventing outsiders from being able to clearly see inside when your lights are on inside.
Summary: Window Screens Replacement to Save Money
Keeping your screens in good shape and knowing when it’s time for a window screen replacement will help improve your comfort levels as well as your home’s appearance. Additionally, if you manage your window screen replacement correctly, and invest in energy–efficient screens, you can reduce your home’s energy bills.
If you have any questions or need help with replacing window screens, feel free to reach out to a professional window repair company like Southgate Glass for assistance. We are one of the largest glass and window companies in the Sacramento area, you may contact us at (916) 476-8396.